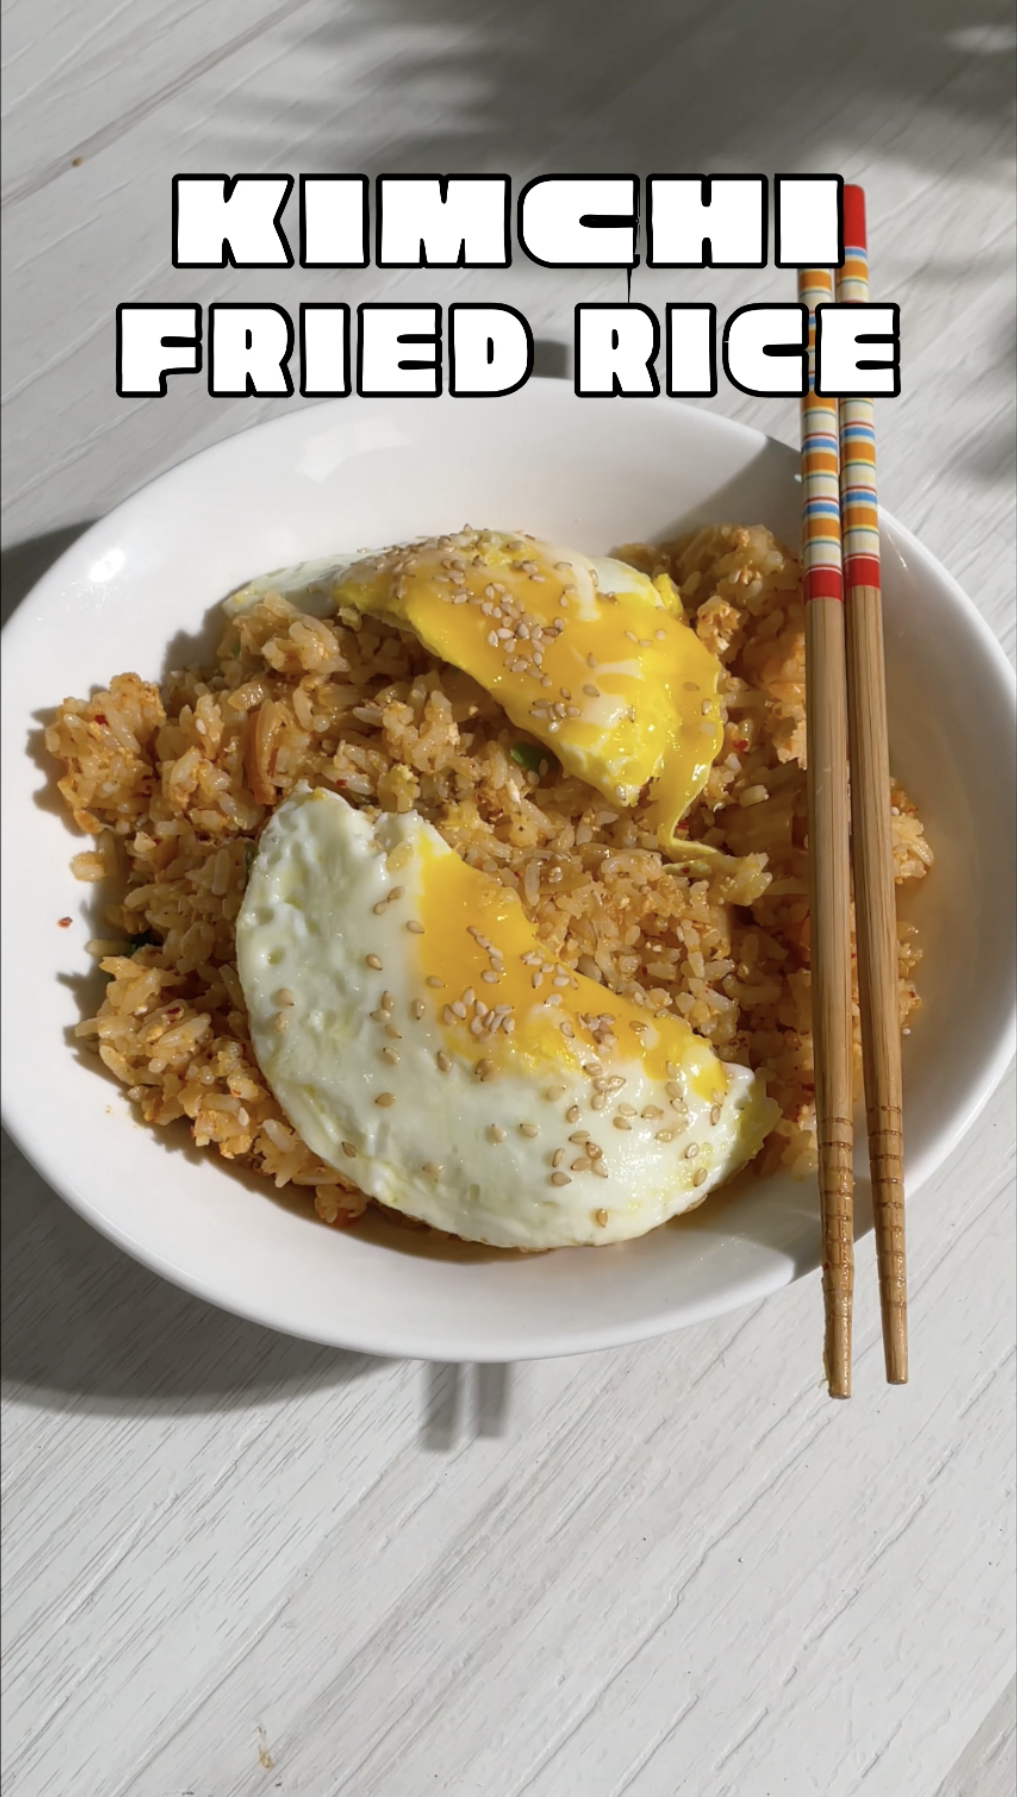
Kimchi Fried Rice [?????]
Bold, Savory heat.

Kimchi Fried Rice (김치 볶음밥)
Kimchi Fried Rice, or Kimchi Bokkeum Bap, is a bold and flavorful Korean comfort dish that turns humble ingredients into a satisfying meal. It’s the ultimate quick-fix recipe, perfect for using up leftover rice and kimchi while delivering a punch of umami and spice. The magic lies in the balance—tangy, fermented kimchi, buttery richness, and a fried egg on top for that silky, runny yolk goodness. Whether enjoyed as a late-night snack, a quick weekday meal, or paired with other Korean side dishes, this one-pan wonder is easy, customizable, and packed with depth.
Key Ingredients
Base Ingredients:
- 1 tbsp butter or oil – Butter adds richness, while oil keeps it lighter.
- 1 tsp garlic (minced) – Enhances the flavor with a mild pungency.
- 1 cup chopped kimchi – Aged kimchi is preferred for its deep tangy-sour profile.
- A pinch of salt – To balance the flavors.
- 3 cups cooked rice – Day-old rice works best for texture.
Eggs:
- 1 egg (for stir-frying) – Mixed into the rice for creaminess.
- 1 egg (for topping) – A fried egg with a runny yolk adds richness.
Garnishes:
- 1 tsp sesame seeds – Adds a nutty crunch.
- 1 spring onion (chopped) – Provides a fresh, slightly sharp contrast.
How to Make Kimchi Fried Rice
Step 1: Prep the Ingredients
- Use day-old rice for the best texture. If using fresh rice, spread it on a plate and let it cool slightly.
- Chop the kimchi into bite-sized pieces, ensuring it mixes evenly with the rice.
- Mince the garlic and chop the spring onions for garnishing.
Step 2: Cook the Base
- Heat 1 tbsp butter or oil in a pan over medium heat.
- Add 1 tsp minced garlic and sauté for 30 seconds until fragrant.
- Stir in the chopped kimchi and cook for 2–3 minutes to release its juices and intensify the flavors.
Step 3: Add the Rice
- Add the cooked rice to the pan and break up any clumps with a spatula.
- Stir-fry everything together, allowing the rice to absorb the flavors from the kimchi.
- Sprinkle a pinch of salt to enhance the taste.
Step 4: Stir in the Egg
- Push the rice to one side of the pan.
- Crack 1 egg into the empty space and scramble it lightly.
- Once partially cooked, mix the egg with the rice for a creamy texture.
Step 5: Cook the Fried Egg
- In a separate pan, fry 1 egg to your preferred doneness (runny yolk recommended).
- Place the fried egg on top of the rice before serving.
Step 6: Garnish and Serve
- Sprinkle sesame seeds and chopped spring onions over the rice.
- Serve hot with a side of kimchi, pickled radish, or extra gochujang for spice.
Tips and Variations
- Use Aged Kimchi: Older kimchi (at least 2–3 weeks old) gives a more intense and tangy flavor.
- Extra Crispy Rice: Press the rice down in the pan for 1–2 minutes before stirring to create crispy bits.
- Add a Protein Boost: Stir in diced spam, chicken, or tofu for a heartier meal.
- Spice It Up: Add ½ tsp gochujang or red chili flakes for an extra kick.
Tips for Success
- Don’t Overload the Pan: Cooking in batches prevents soggy fried rice.
- Use High Heat: A hot pan gives a smoky, slightly charred flavor.
- Balance the Salt: Taste the kimchi before adding extra salt since it’s already seasoned.
Customizable Variants
- Cheesy Kimchi Fried Rice: Melt grated mozzarella or cheddar on top for a creamy twist.
- Kimchi Fried Rice with Meat: Add bacon, ground pork, or shredded chicken for a meatier version.
- Vegan Option: Use tofu instead of eggs and ensure the kimchi is vegan (no fish sauce).
Pro Tips for Meal Prep
- Pre-Chop Kimchi: Store chopped kimchi in an airtight container for quick meals.
- Make-Ahead Sauce: Mix kimchi juice, soy sauce, and gochujang and store for easy cooking.
- Batch Cook Rice: Cook extra rice and refrigerate for up to 3 days for future meals.


![Teriyaki Tofu [??????]](https://seycooks.com/wp-content/uploads/2025/01/Tofu-Teriyaki-e1739289731779-768x769.png)

![Bibim Guksu [????]](https://seycooks.com/wp-content/uploads/2025/01/Bibim-Guksu-e1740476843207-768x768.png)